

The 3D position of an implant: what does restoration-driven planning mean?
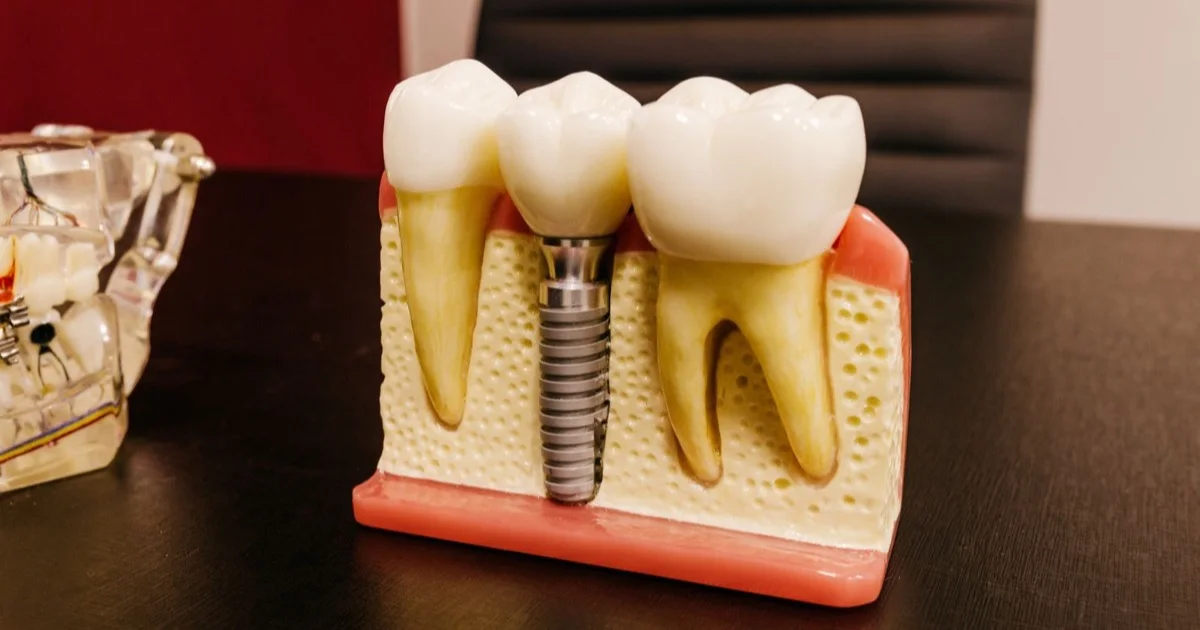
An implant is not placed «where there is most bone», but «where the future tooth needs to be». This is called restoration-driven planning: first the end result — the shape and position of the tooth — is designed, and then the implant is positioned in three planes accordingly. An implant placed too close to the neighbouring tooth, too far towards the lip or too deep leads to bone and gum loss, a crown that cannot be cleaned and an aesthetic problem. A positioning error cannot be corrected afterwards with the crown; that is why 3D imaging, digital design and a surgical guide are part of the plan.
Key points
- The position of an implant is assessed along three axes: mesio-distal (distance to the neighbouring teeth), bucco-lingual (lip–palate direction) and apico-coronal (depth).
- Classic rules: at least ~1.5 mm to the neighbouring tooth, at least ~3 mm between two implants.
- Restoration-driven planning: wax-up or digital design → merging with CBCT → implant position → surgical guide.
- With guided (static navigation) placement, the mean deviation in studies is a little over ~1 mm; that is why a 2 mm safety margin is kept.
- Position is not only about aesthetics — it also determines whether a screw-retained crown is possible, how well the area can be cleaned and the long-term bone level.
Why is placing the implant «where the bone is» wrong?
In the old approach the dentist looked at the bone, placed the implant in the strongest spot, and the prosthodontist then made the crown «as best as possible». The result is familiar: angled, bulky crowns with a visible margin at the gum line; gaps that cannot be cleaned; the screw channel emerging on the front surface of the tooth. The dental implant had integrated into the bone, but the patient was not happy.
In their 2004 review written for the ITI, Buser, Martin and Belser point out two main causes of aesthetic failure: insufficient bone and incorrect implant position. They proposed the concept of a «comfort zone» and a «danger zone» for each axis — when the implant sits in the comfort zone, bone and gum remain stable; once it enters the danger zone, problems begin.
Positioning rules in three planes
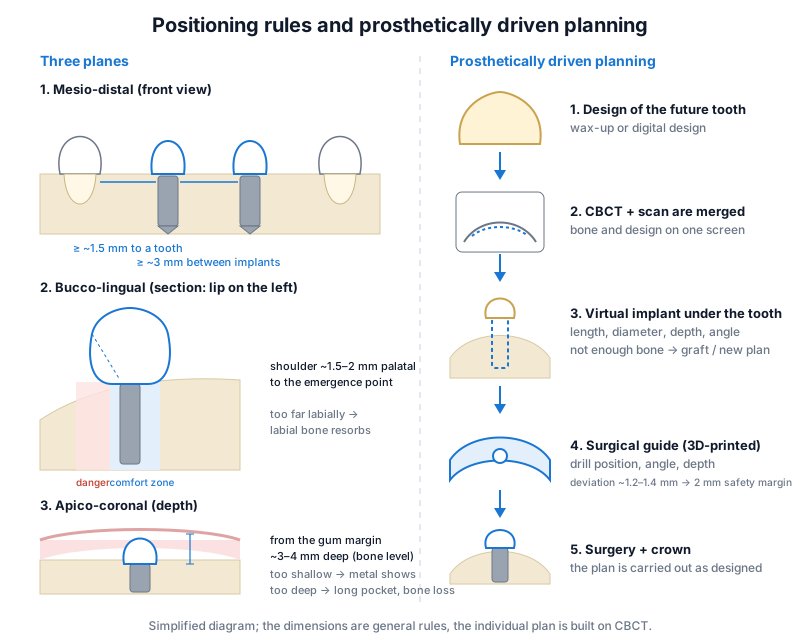 Left: mesio-distal, bucco-lingual and apico-coronal zones. Right: the path from the design of the future tooth to the implant position and the guide.
1. Mesio-distal: distance to the neighbouring teeth and to each other
When an implant is placed too close to the root of the neighbouring tooth, the crest of bone between the tooth and the implant is lost and the papilla (the triangle of gum between the teeth) collapses. The generally accepted rule is to keep at least ~1.5 mm of bone between the implant and the neighbouring tooth.
When two implants are placed side by side, the distance matters even more. In the study by Tarnow and colleagues in the Journal of Periodontology (36 patients, adjacent implants, radiographic measurements), when the distance between the implants was more than 3 mm, crestal bone loss averaged 0.45 mm, and when it was 3 mm or less, 1.04 mm; lateral bone loss of ~1.3–1.4 mm from the edge of each implant was also measured. In simple terms: when two implants are placed too close together, the bone between them resorbs and there is no support left for the papilla. That is why, for two adjacent front teeth, one implant with a cantilever pontic is sometimes planned instead of two implants.
2. Bucco-lingual: towards the lip or towards the palate?
In the front zone this is the axis where mistakes are made most often. When an implant is placed too far towards the lip, the labial bone in front of it becomes thin, then resorbs, and the gum recedes — the crown looks long and the grey edge of the abutment becomes exposed. When it is placed too far towards the palate, the crown comes out «stepped» and bulky, the tongue touches it and it does not stay clean.
The comfort zone lies slightly towards the palate from the labial surface of the future tooth: the shoulder of the implant should sit approximately 1.5–2 mm inwards from the emergence point of the future crown. This both preserves the thickness of the labial bone and allows the crown to emerge from beneath the gum with a natural root form. We have explained how important this bone is in the front zone in our article on implant placement in the aesthetic zone.
In the back teeth, the main criterion is that the chewing load falls on the middle of the tooth: when the implant sits beneath the central fossa of the tooth, the crown receives the load straight on and the screw channel emerges in the middle of the chewing surface.
3. Apico-coronal: how deep?
When an implant is placed too shallow, the metal margin shows through the gum and there is no room for the crown to emerge from beneath the gum. When it is placed too deep, a long «tunnel» is created: cleaning becomes difficult, the risk of residual cement and inflammation increases, and bone loss goes deeper.
With bone-level implants, the comfort zone is approximately 3–4 mm apical to (deeper than) the future gum margin; some authors express this as ~1 mm deeper than the cemento-enamel junction of the neighbouring tooth — it varies with the implant system and design. What matters is the idea: depth is chosen according to the future gum margin, not according to the bone. We explain what happens at this level in the following years in our article on bone loss around an implant.
4. Angulation — the fourth dimension
Even if the position is correct, if the axis of the implant (angulation) is too tilted, the screw channel emerges on the front surface of the crown and screw retention becomes impossible; an angled abutment is needed. This directly limits the choice between a screw-retained or cement-retained restoration. In planning, the axis is directed towards the incisal edge of the future tooth or the centre of the chewing surface.
Restoration-driven planning: the steps
«Backward planning» means starting from the end. The sequence is as follows:
- Design of the future tooth. In the classic method a wax tooth (wax-up) is made on a plaster model; in the digital method the tooth is modelled on a computer after an intraoral scan. If several front teeth are being restored, this stage is combined with digital smile design.
- Merging with CBCT. The 3D scan (bone) and the intraoral scan (teeth, gums, design) are superimposed in the software. We have talked about CBCT itself in our article on why CBCT is important for implants; here only its role in planning matters.
- Virtual implant. The implant is «placed» beneath the future tooth: length, diameter, depth, angle. At this moment the dentist can see whether there is enough bone, how far away the sinus or the nerve canal is, and where the screw channel will emerge.
- Decision. If the bone does not match the design, either bone is grafted, or the number/position of the implants is changed, or the restoration design is reconsidered. This decision is made on the screen, not on the operating table.
- Surgical guide. The plan is transferred to a 3D-printed guide; the guide limits the position, angle and depth of the drill.
- Temporary crown (sometimes prepared in advance). Since the position is known beforehand, the temporary tooth can be made before the surgery.
How accurate is a guide?
A frequently asked question: «If the computer has planned it, then it must be completely accurate?» No, but it is predictable. According to the meta-analysis by Tahmaseb and colleagues in Clinical Oral Implants Research (20 studies, 2238 implants placed with static guides), the mean deviation between the planned and the actual position was 1.2 mm at the entry point of the implant, 1.4 mm at the tip and 3.5° in angle. For this reason the authors recommend keeping a safety margin of at least 2 mm from important anatomical structures (nerve canal, sinus, neighbouring roots). In partially edentulous jaws (where the guide rests on the teeth) the accuracy is higher than in fully edentulous jaws.
The 2018 ITI Consensus Report (Group 5 on digital technologies) recommends static navigation as an additional tool for diagnosis, planning and surgery; at the same time it warns that an implant placed with a guide without raising the gum (flapless) may end up outside the zone of keratinised gum — in other words, a guide does not replace the dentist's clinical judgement.
Consequences of a positioning error
| Error | What happens |
|---|---|
| Too close to the neighbouring tooth | The bone crest is lost, the papilla collapses, black triangle |
| Too far towards the lip | The labial bone resorbs, the gum recedes, the crown looks long |
| Too far towards the palate | Bulky, stepped crown; difficult to clean |
| Too shallow | The metal margin shows, no room for the emergence profile |
| Too deep | Long pocket, risk of residual cement and inflammation, bone loss |
| Axis too tilted | The screw channel emerges on the front surface, angled abutment, extra load |
Many of these errors show themselves in the first years as bone loss and gum problems; you can read about what to look out for in our article on the signs of implant failure.
What does this mean for the patient?
Simple questions you can ask at your consultation:
- Will the design of the future tooth (wax-up or digital) be prepared before the implant?
- Has the plan been merged with CBCT? Can I see the position of the implant on the screen?
- Will a surgical guide be used, or will the implant be placed freehand? Both approaches have their place, but the answer should be justified.
- Will the crown be screw-retained or cement-retained — and does this decision depend on the position?
Having these steps written down in the dental implantation plan makes expectations clear.
Frequently asked questions
What happens if the implant position shifts by a few millimetres? In a back tooth, a small deviation can often be compensated for with the crown. In a front tooth, however, a 1–2 mm shift towards the lip can result in gum recession and a visible metal margin.
Can an implant be placed correctly without a guide? Yes, in straightforward cases an experienced dentist can also achieve the correct position freehand. A guide reduces deviation especially in the front zone, near anatomical structures and with multiple implants.
Why does a wax-up cost money and time when the implant has not even been placed yet? Because the position of the implant is chosen precisely on the basis of it. An implant placed without a design then has to be «adapted» to the design afterwards — and that is more expensive and less predictable.
Are two implants always needed for two front teeth? No. It is difficult to maintain the bone and the papilla between two implants; very often one implant with an attached pontic gives a better aesthetic result.
Does planning make the surgery longer? On the contrary: the preparation takes longer, while the surgery itself is shorter and passes with fewer surprises.
Conclusion
An implant is positioned according to the future tooth, not according to the bone. The positioning rules in three axes — ~1.5 mm to the neighbouring tooth, ~3 mm between implants, slightly towards the palate from the emergence point and an appropriate depth relative to the gum margin — are the condition for the bone and gums remaining stable for years. A wax-up or digital design, merging with CBCT and a guide put these rules into practice. A consultation and 3D planning are the first step towards assessing your individual situation.
Sources
- Optimizing esthetics for implant restorations in the anterior maxilla: anatomic and surgical considerations — International Journal of Oral and Maxillofacial Implants, 2004
- The effect of inter-implant distance on the height of inter-implant bone crest — Journal of Periodontology, 2000
- The accuracy of static computer-aided implant surgery: A systematic review and meta-analysis — Clinical Oral Implants Research, 2018
- Group 5 ITI Consensus Report: Digital technologies — Clinical Oral Implants Research, 2018
This article is for general information only and does not replace an individual diagnosis, examination or treatment. Consult a doctor for a decision about your case.